

Traditional Equipment
Stand--marudai (handheld disk or a full stand)
Tama--bobbins with bobbin ties
Counterweight bag--simple drawstring bag
Weights--can be anything-even pennies (I use large nail clippers for the handheld)
Chopstick--to help keep your place and not mess up your pattern if you step away
Notebook and Pencil --to make notes and keep a braiding log so you can make the same braid over again in the future. Some of the strangest mistakes make great patterns.
In this class, we will be working on learning how to read marudai patterns using a handheld disk. The basic braids that can be made on a marudai are round, hollow, square and flat.
I remembered to update my page on 5/26/2013

Beginning Kumihimo
Equipment for Class
 | ||||||
Easy Basic Equipment
The Stand
We will be using a hand held version of the Marudai. It can be made out of any stiff piece of board from a cereal box, foam board, or 1/8-1/4” wood round or square. The Pattern is on the first page of the Handout. The Round Disk is 6 inches in diameter. A 6 inch Square will work also.
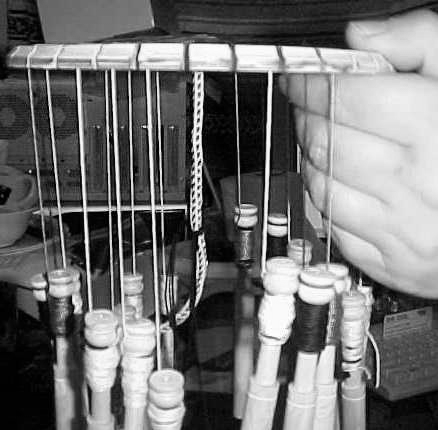
With the handheld version threads are moved one at a time. The tension on the individual threads is maintained by the slots gripping the threads and the tension on the finished braid is by holding the braid or a light counter weight attached ( I use a large set of nail clippers). With this method, you will be moving each thread individually. For longer braids I use light weight Tama or bobbins. I have used old round clothespins. As you can see in the picture below, I am using bobbin lace bobbins.
On a regular marudai you move 2 bobbins at the same time. Weighted bobbins called Tama and a weighted drawstring bag used as a counter weight maintains the tensioning on the braid instead of the slots.
Tama
Tama—-bobbins (generally not needed for the cardboard method unless braiding a long braid)
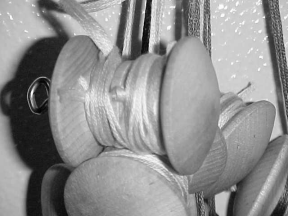
I have used various items to make tama. Old round clothespins, bobbin lace bobbins, nuts and bolts, drawer knobs, electric fence insulators, floss holders, and empty film canisters.
How to make film canister 70gr tama
Empty film canister with lid
2 rubber bands
28 US pennies
Bobbin ties—double the length of the radius of the top of the stand plus 4-6inches (Example: 6 inch diameter marudai would need 10-12 inch ties measured out)
Postal Scale that measures in grams
Place a rubber band on each end of the film canister so your threads won’t slip off.
If you're working with bobbins with 28 pennies each, your bobbin weight could be anywhere from 70 grams to 87 grams (Pre 1983 pennies weight abit more). Place 28 pennies into the film canister. Then double a bobbin tie, tie a knot in the loose ends and then hitch knot the tie around the canister. The tie is to help maximize using all the thread available in the braid. Weight each one and adjust the number of pennies til they are all of equal weight.
The most popular weights for tama are 70 and 100gr.
The reason to keep all the weights equal is the change in tension on each set of thread(s) can skew the braid.
Counterweight Bag
The braid can be loose or tight.
The counter weight bag on average should be half of the total weight of the bobbins
For a loose braid, the counter weight needs to be heavier than half the total Tama weight.
For a tight braid, the counter weight needs to be lighter than half the total Tama weight.
When I am working on a slotted disk I use a large nail clipper or thread clippers as the counterweight.


Left: my slotted disk with bobbin lace bobbins
Above: My drawer knob Tama that weigh around 15 grams